Thursday, September 22, 2011

Necklace Rack for Less Than $1

I had been keeping my necklaces on a store-bought rack that was quite pretty, but it left them tangled up and discouraged me from wearing them. So I've been thinking for awhile of something to make to display them in a neat manner, making them easy to get to. Found tons of ideas on Pintrest, but they all required tools or supplies that I didn't have on hand. So on my last trip to Walmart, I spotted a 5-gallon paint stirrer. A nice, flat, shapely wooden stick for 28 cents. Perfect! Pretty sure I could afford that. So here is how you make a 28-cent necklace rack (assuming you have the other supplies on hand like I did).


Supplies:
1. 5-gallon wooden paint stirring stick
2. Paint
3. Nails
4. Measuring tape or ruler
5. Ribbon
6. Stapler or hot glue
7. Hammer

Step One

Paint the stirrer in the color of your choice. I chose white. Let it dry completely before doing another coat and letting that dry as well.


(I really need to work on taking pictures as I do my projects, but I did this one over the course of a few days)

Step Two

Lay the ruler or measuring tape on the stirrer and mark of 1-inch increments in pencil.


Step Three

Staple or hot glue a ribbon to the back. Since I experimented with this first, I will tell you two things I did wrong here. 1: I tied knots on the ribbon ends. I later had to take them out to make the hammering easier. 2: I didn't staple as closely to the top as I could have. This makes it tilt forward once hung up. So, not knots and staple/hot glue close to the top. Okay? Okay.


This is more secure than it looks, btw...

Step Four

This step is best not done on your dining room table. Gather your hammer and nails, go outside, and hammer nails into the spots you marked off earlier. Make sure they will all be tilted a little bit upward when it is hung up. Downward-pointed nails = necklaces on the ground. No bueno.


See how my ribbon is sticking out of the end because I had to untie the knots here? Yep. Just trimmed that off.

Step Five

Hang it. A little more trial-and-error happened here. I first tried hanging it on one nail. Yeah, not so smart. I couldn't keep it balanced. So I used ever-so-classy clear push pins. Two of them. This helped stabilize it. Now you are ready to display your jewelry!


I never noticed how many heart necklaces I had...

Tuesday, September 20, 2011

DIY Mod Podge

Mod Podge. Crafters love the stuff. With all of its glorious sticky and sealing qualities, how can we not? It has so many uses! And, my firends, I've learned a way to make your own for MUCH cheaper than buying the brand-name.

Supplies:


1. Regular cheap-o school glue (I scored this for 10 cents at Walmart! Back-to-school supplies a few weeks after school started)
2. Air-tight jar (I used a pasta sauce jar, so free!)
3. Water

Step One

Empty the glue into the bottle. I let it stay upside down for several minutes until it stopped dripping.

Step Two

Fill the empty glue bottle about 3/4 full of water. Pour that into the jar. Close the lid. Shake shake shake! That's it. You're done! And if you managed to also find a ten cent bottle of glue, you now have ten cent mod podge!


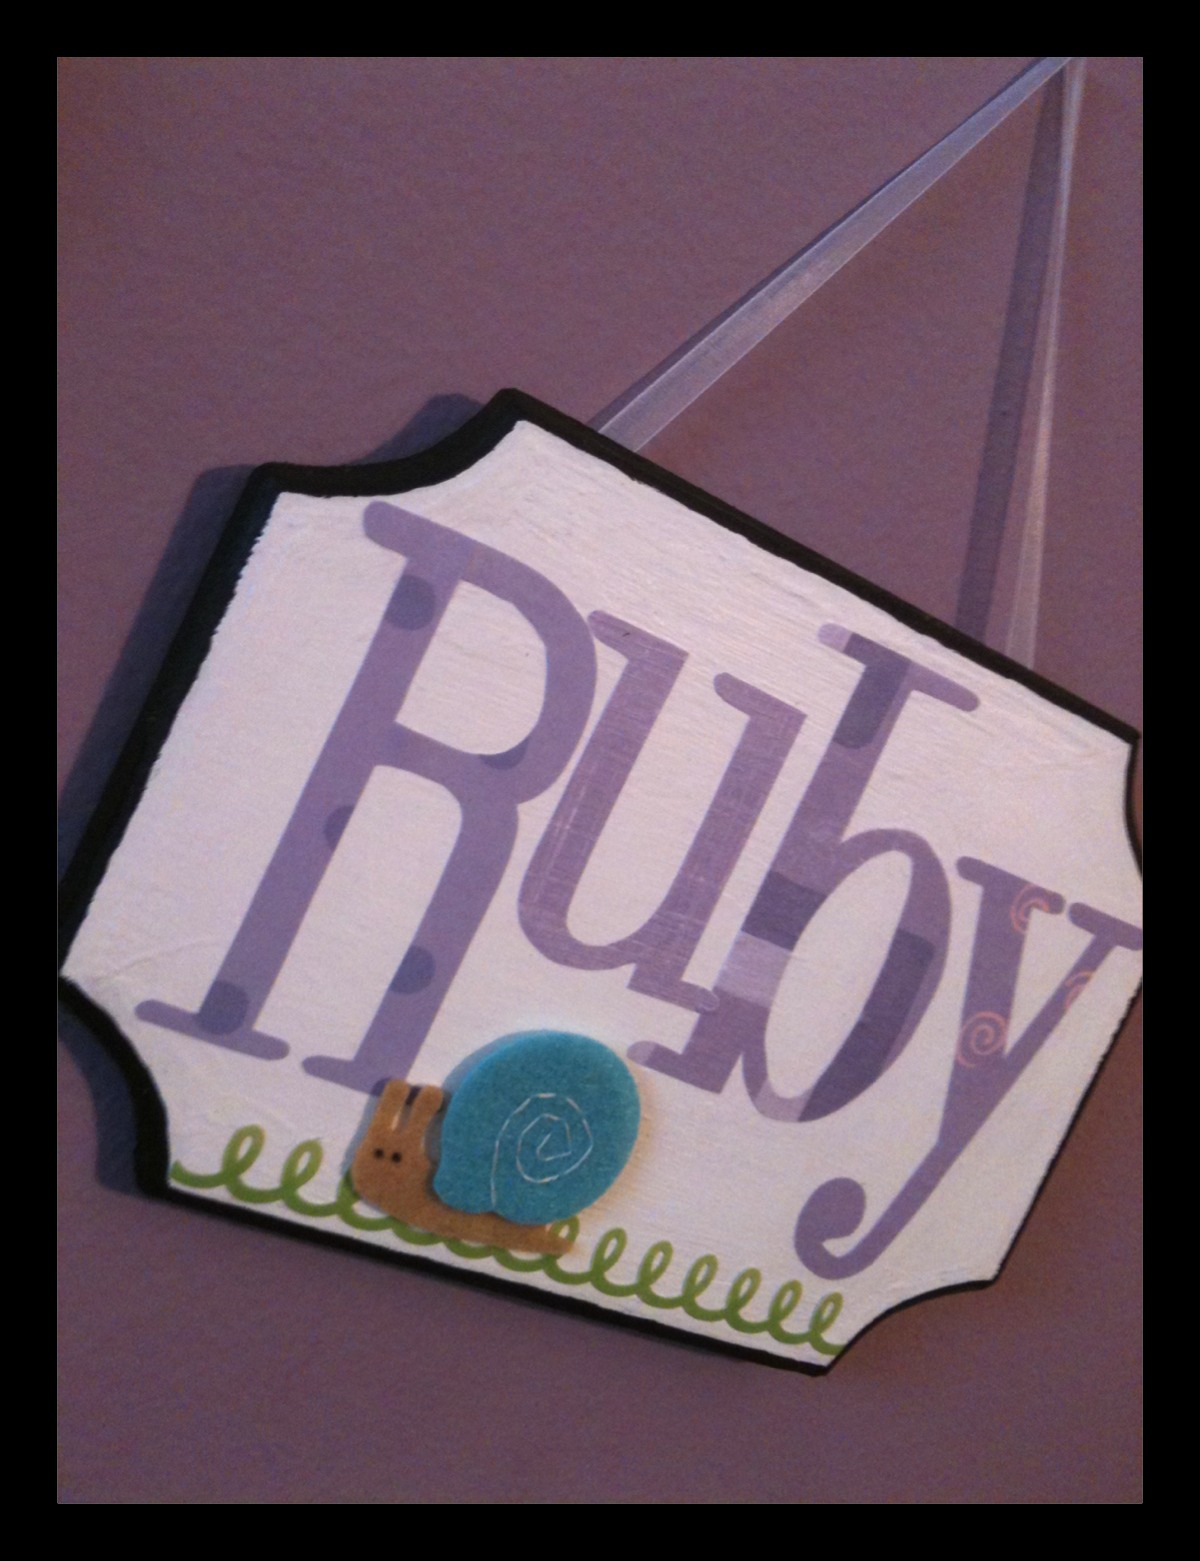
Now what do you do with it? Basically, it acts as an adhesive and sealant of sorts. You can paint some on a box and adhere decorative paper to it. Let it dry, then cover with another layer to seal the paper. Here is the project I just finished today. I got a wooden plaque, painted it, and let it dry. Then I cut out some letters from scrapbooking paper I've had for YEARS. I brushed some of my new mod podge onto the surface and stuck on the letters.


Once it was dry, I brushed on another layer to seal the paper. Added a few stickers, attached a ribbon to the back, and voila!


Birthday present for a seven year old that loves purple and bugs. (Don't tell her yet! Her party is this weekend...)

Sunday, September 18, 2011

Chalkboard Menu

Want to learn how to make an easy, cheap, cute, and very functional project? You do? I'm so glad! Here is how to make a chalkboard menu.


Supplies:


1. Mini cookie sheet ($1 @ Dollar Tree)
2. Chalkboard paint (~$7 @ Michael's... although I used my 40% off coupon for it, woohoo!)
3. Chalk ($1 @ Walmart for a 12 pack of colored sticks)
4. Various paint colors (I used two colors, $1 or $2 each @ Walmart)
5. Paintbrushes (You probably have on hand, but you can buy a big variety pack for $5 at Walmart)
6. Some sort of adhesive or mounting system (Mine was $3 at Walmart, but you could screw it into the wall or hot glue a ribbon to the back)

Total spent: Eh, I'll say around $11, but the paint will be used for many other projects as well. I'm considering this a $4 project, just because of the cookie sheet and adhesive.

Step One

Thoroughly wash and dry your cookie sheet. Mine was a little bent since I bought it several months ago with the intentions of putting it in the house area at work for the kids to play with, but I knew/hoped it would flatten out once it was mounted on the wall (and it did!).

Step Two


Do your first coat of chalkboard paint directly on your squeaky clean cookie sheet. Use a small brush to paint the edges of your design and a larger one to paint the middle. Make it as even and un-lumpy as you can, but I guarantee you will see brush strokes on the finished product. I think it gives it more charm, though. =)

If you want, you can of course cut out the shape you want to paint from a piece of paper and then outline it on the cookie sheet with a black permanent marker. That would give you a chance to make sure it is perfectly as you want. I was pretty confident in my ability to wing it, though.

Step Three

Wash your paint brushes out so the paint doesn't dry in them. Oh! I forgot about my new trick! I didn't have a paint tray and didn't feel like buying one. Figured I'd jimmy something up once I got home. So I took a small plate and covered it in foil. When I washed out my brushes, I simply removed the foil and tossed it. Before the next coat, I covered it in a new piece of foil. This way, I didnt't have to wash it and the fresh paint didnt't mix with the sticky or dry paint. Made my life so much easier!


Okay, so your paint brushes are now drying. Let the first coat of paint dry on the cookie sheet completely for at least an hour. 

Once dry, do a second coat, paying close attention to the edges.

Step Four

Repeat step three. Wash brushes, new foil, let paint dry for an hour.

Third coat. Again, pay close attention to the edges. Three coats was all I needed. Let this last coat dry for another hour.


Step Five

Details! Using any color you'd like, paint whatever design you want on it. I chose two shades of blue to match the rest of the kitchen. Bright colors look really good on chalkboard paint, btw. =) You don't have to use the design I did, but if you do, start with a dotted border. Then a title. Then the letters for the days of the week. Then lines to separate the days' foods.


While doing the details, I realized it would have been a lot easier/ more professional looking if I had bought some paint pens. Alas, I'm cheap. Doing it by brush worked fine for me. But if it's that important to you and you don't mind spending some extra dough, paint pens would be easier.


Step Six

Following the directions on the chalkboard paint bottle, wait at least 24 hours before using this. Then, lightly color the whole chalkboard part with chalk and wipe it clean. I guess this conditions it. While you are waiting, you can flip it over and work on whatever system you are going to use to mount it. I used little Command sticky tag things. It's essentially like Velcro that is sticky on the back, only this will come off the wall cleanly. I was happy to find it! If it was cheaper, I'd use it in my classroom as well. Our walls are terrible for staples and tape. =\

Step Seven

After you've waited 24 hours, hang it up, write your weekly menu, and enjoy! Now you and the rest of the family know what to expect and you can see what you need at the grocery store.


Did I mention it's magnetic?

Saturday, September 17, 2011

Project Earring Storage

So what happened to all of my projects I said I was gonna do, huh? Yeah, I don't know either. Laziness. Since I've been home sick with nowhere to go and no energy to do anything, I've been spending a lot of time on Pintrest getting ideas for pretty much everything. Organizing, crafts, decorating, baking... literally everything. I love the site. I have so many new ideas that I want to get started on when I get better and have motivation. But I thought I'd do a post in my blog showing one of my ideas and one idea I stole from somewhere else. How I store my earrings.

Stolen idea:


I keep my studs, hoops, and some dangling earrings in ice cube trays. It makes it SO easy to keep them paired up and easy to get to. I use to put my studs on a lacy ribbon hung on the wall. It was really cute, but it wasn't convenient to hang them up easily at the end of the day. So I searched around for other ideas. I really didn't want to put them all in one container because it makes it hard to see what your options are. Then I saw this somewhere. Maybe a magazine. Maybe online. No idea. But it's perfect! Since it's not too cute, I put them in a drawer so I don't have to look at them all the time. You can stack them if you want, also.

Own idea:


Pardon the crooked picture. This is definitely cuter than ice cube trays and I love having it displayed. =) I got a cheap frame on sale at a craft store (Dollar Tree, Goodwill, garage sale, one lying around, wherever). Took out the glass and cardboard and all so all it was was the wooden frame. Stapled a piece of that plastic grid whatnot that kids use for easy cross-stitching to the back. There are a lot of colors to choose from, but I like how black shows off the earrings. Stapled a ribbon to the top. You could also use mounting hardware, but ribbons and staples are so much easier. I thought I was done after this, but I encountered a problem when I hung it up. Since the back of the frame was flush against the wall, all of the hooks of the earrings were pushed upward and fell out. Um, oops! So, to create some distance between the wall and the hooks, I put some push pins where the corners of the frame would hit the wall. Perfect!


So there you have. Two easy solutions to a problem I'm sure a lot of accessory-loving ladies have. I have an idea of something to do with all of my necklaces next, but I need to find our drill and get some supplies first... so that will have to wait. =)

Saturday, August 27, 2011

Meh.

I finished the bag I was crocheting. I'm not happy with it, though. I made the body waaaaaay too long. So I'm going to make a few changes and crochet another. Luckily I can just re-use the flowers and strap I made. They bag was really the easiest part. =)

Went back to work on Monday. Promptly started feeling sick on Monday evening. I don't know what was setting off my allergies. Maybe the construction they're doing on our patios. Maybe the construction they did inside one of the classrooms. Maybe just something in the air ducts. Regardless, it's now a full-blown infection and I am SO not liking this. I hate going to the doctor for it because there really isn't much they can do besides give antibiotics. And if I took those every time I had sinus problems, they'd probably end up ineffective or giving me a different kind of infection. Making friends with my tissue box, Mucinex, and a neti pot.

The worst part of being sick is having to stay away from my husband. =( We sleep in separate rooms if one of us is sick because I catch everything too easily and when he does catch something, he gets it BAD. Ly. Badly.

I'm pretty excited about this next school year. My two co-teachers are wonderful in every way. We are going to be laughing a lot this year! Our room is set up a little differently than usual and I'm curious as to how the children will react to it. I like it, though. =) We have a lot of older children this year. That should make it a little more challenging... in a good way.

Ugh, I'm pooped. Hasta la pasta.

Saturday, August 20, 2011

Project Crochet Bag Beginning

Um, hello. Three months have passed since I last updated. I've been wasting a lot of time lately doing... nothing much. Facebook, game apps on my phone, watching movies. I came to the realization that I've been lazy as all heck lately and am trying to get out of the habit.

How? Projects!

I got a new crochet pattern book full of super cute ideas, some yarn, and a few new hooks and started on a new bag today.


I don't think I've ever crocheted anything so... 3-dimensional before. Obviously it's not done yet. The bottom is a circle and, well, I'm new to the whole crochet language (5 ch then 3 hdc in 3 ch sp... confusing, huh?), so it wasn't what it was supposed to be. At one point, I should have had 10 loops, but I had 15. Oops! But it's not really noticeable unless you reeeeeally examine it. The other part of the bag (the body?) was supposed to have this fancy pattern of random spaces and it looked pretty neat. However, since I wouldn't have even been able to get past the first row by following the pattern, I decided to just make it a double crochet the whole way up.

Unlike this picture, it is actually a really pretty mint green color. When I finish it, I'll probably crochet some little flowers or something to make it a little cuter and less plain. It's going a lot faster than I thought it would, though. I did all that in about three hours.

When I'm done with this project, I'll start another. Anything to keep me from wasting my life away. 

Monday, May 16, 2011

Projects: Lotta Projects...

Wow, I fail at being consistent.

I've been doing quite a few projects, few of which have been worthy of pictures. But some have.

Project Elmo Cupcakes.

Should have made fondant noses. Now I know. And now I also know that I need to stick with the other method of marbleizing cupcake batter so I don't crease the papers and make them all different sizes.

Project Friggin' Delicious Kahlua Frosting.

The recipe called for a few tablespoons of Kahlua. I put in about 1/3 cup. =) And I looooved the box. I wish I had more of those stickers.
Project Cute Little Cake.

I think this is one of the cutest ones I've ever done. =)

Project Yo Gabba Gabba Cupcakes.


Soooooooo fun to make!!

Project Yo Gabba Gabba Cake (obviously same project as above).


The little robot guy (I believe his name is Flex) was my favorite. =) Random tidbit of information, our housemate looks and acts like a Hispanic version of the guy on this show. And I love the word "tidbit."

Project 'Nother Flower Cake.


I loved the little rose buds on the bottom two tiers, but man... that bead border! And I still have no idea how the pros make their buttercream completely smooth. This is why I need/want to go to school to learn. (Although I did make my most amazing bead border a few days ago... and forgot to take a picture of that cake)

Project Music Cupcakes.


I made the notes out of milk chocolate. So much yummier and easier than fondant! I'm trying to start doing more with melting chocolate. Kind of expanding my hypothetical portfolio.

Project Guitar Cake.


This was the size of an actual guitar. I had a mental breakdown in the middle of it, but I was quite happy with how it turned out. The knobs are Rollo's. =) This was my first cake that required an actual piece of wood as a base. Yay for Home Depot! I was going to use embroidery floss for the strings so they were straight, but the floss was all creased and it was to late to iron it. So I ended up just piping them with frosting. And I got to use food coloring spray paint. When I can afford it, I want to buy my own gun for the food color spray, but they cost too much for the moment.

Project Surprise My Mommy Cake.

...This is the one I forgot to take a picture of. I made white chocolate daises for it. Her favorite. =)

Project Cake Pops.


These were fun! You make a cake, crumble it up, mix the crumbs with the frosting, form it into balls by hand, jam in the stick, and pour melted chocolate on top to help secure the stick.


Not everything has been cake-y, though. I've also started cooking and cleaning more, but no pictures of that. It's not as cute. I've been trying to spend more time with people, too. Been seeing my family. Going out with my bff now that she's back on this side of the country. Oh, and I'm back working with the youth group at my old church. Those kids keep me young. =)